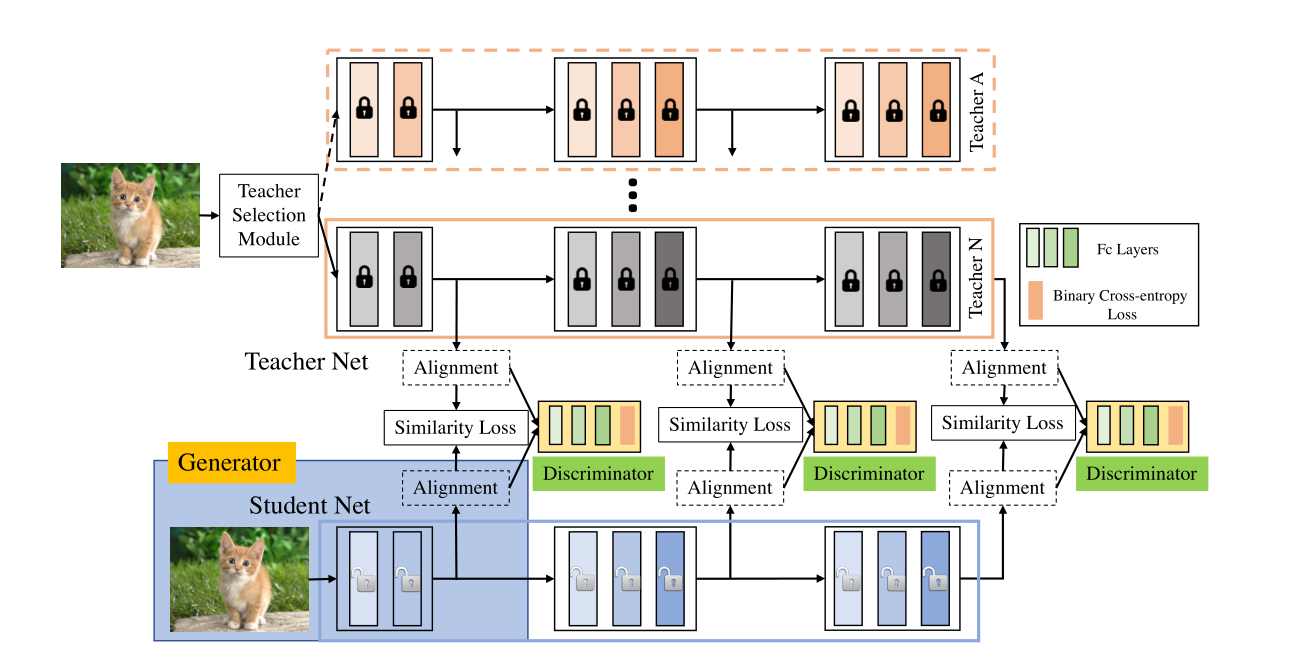
利用条件对抗网络来学习损失函数,从而将知识从teacher转移到student。
网络介绍
网络结构: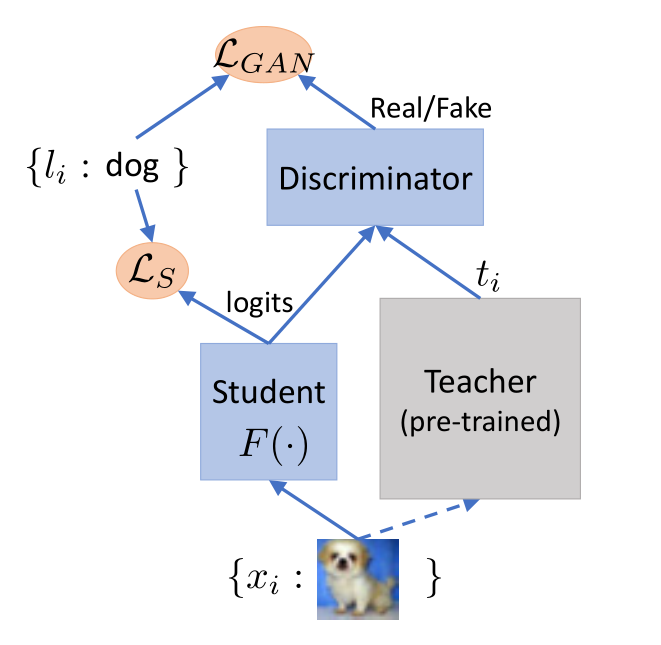
自蒸馏整体网络结构: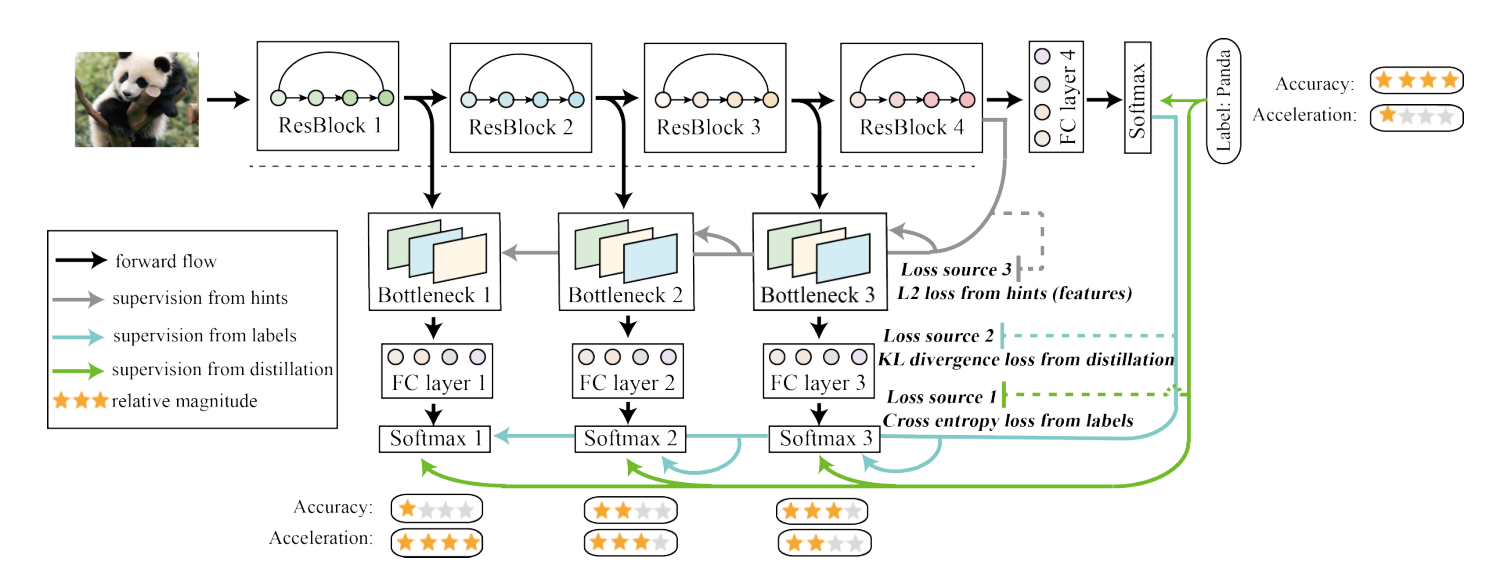
其中,bottleneck可减轻每个浅分类器之间的影响,添加teacher隐藏层L2 loss,并且使teacher与student网络feature map输出大小一致。
1 | async function async1() { |
富文本采用wangEditor
1 | // app.js |
1 | // wangEditorSettings.js |
主要是采用React提供的dangerouslySetInnerHTML。1
2
3
4
5
6
7
8
9
10
11
12
13
14
15
16
17
18
19
20// view.js
class View extends Component {
constructor(props) {
super(props);
//...
}
//...
render() {
const { description } = this.state;
return(
<div
className={styles['description']}
dangerouslySetInnerHTML={{__html: description && description.replace(/<script>/, '<script>').replace(/<\/script>/, '<script>')}}
>
</div>
);
}
}
最近做个表格,想做隔行换色以及自定义单元格数据展示的效果,到网上找了一些方法,算是大概实现了,记录一下。(总结还是一句话,多看API文档)
1 | constructor() { |
1 | :global{ |